

Integrate with Android (adb)
After connecting the Android device with adb, you can use Midscene javascript SDK to control Android devices.
Control Android devices with javascript: https://github.com/web-infra-dev/midscene-example/blob/main/android/javascript-sdk-demo
Integrate Vitest for testing: https://github.com/web-infra-dev/midscene-example/tree/main/android/vitest-demo
Preparation
Install Node.js
Install Node.js 18 or higher.
Prepare API Key
Prepare an API Key for a Vision Language (VL) model.
You can check the models and configurations supported by Midscene.js in the Model Strategy documentation.
Install adb
adb is a command-line tool that allows you to communicate with Android devices. There are two ways to install adb:
- Method 1: Install using Android Studio
- Method 2: Install using Android Command Line Tools
Verify that adb is installed successfully:
When you see the following output, it means adb is installed successfully:
Set the ANDROID_HOME environment variable
Refer to Android Environment Variables to set the ANDROID_HOME environment variable.
Verify that the ANDROID_HOME variable is set successfully:
When the above command has output, it means the ANDROID_HOME variable is set successfully:
Connect Android Device
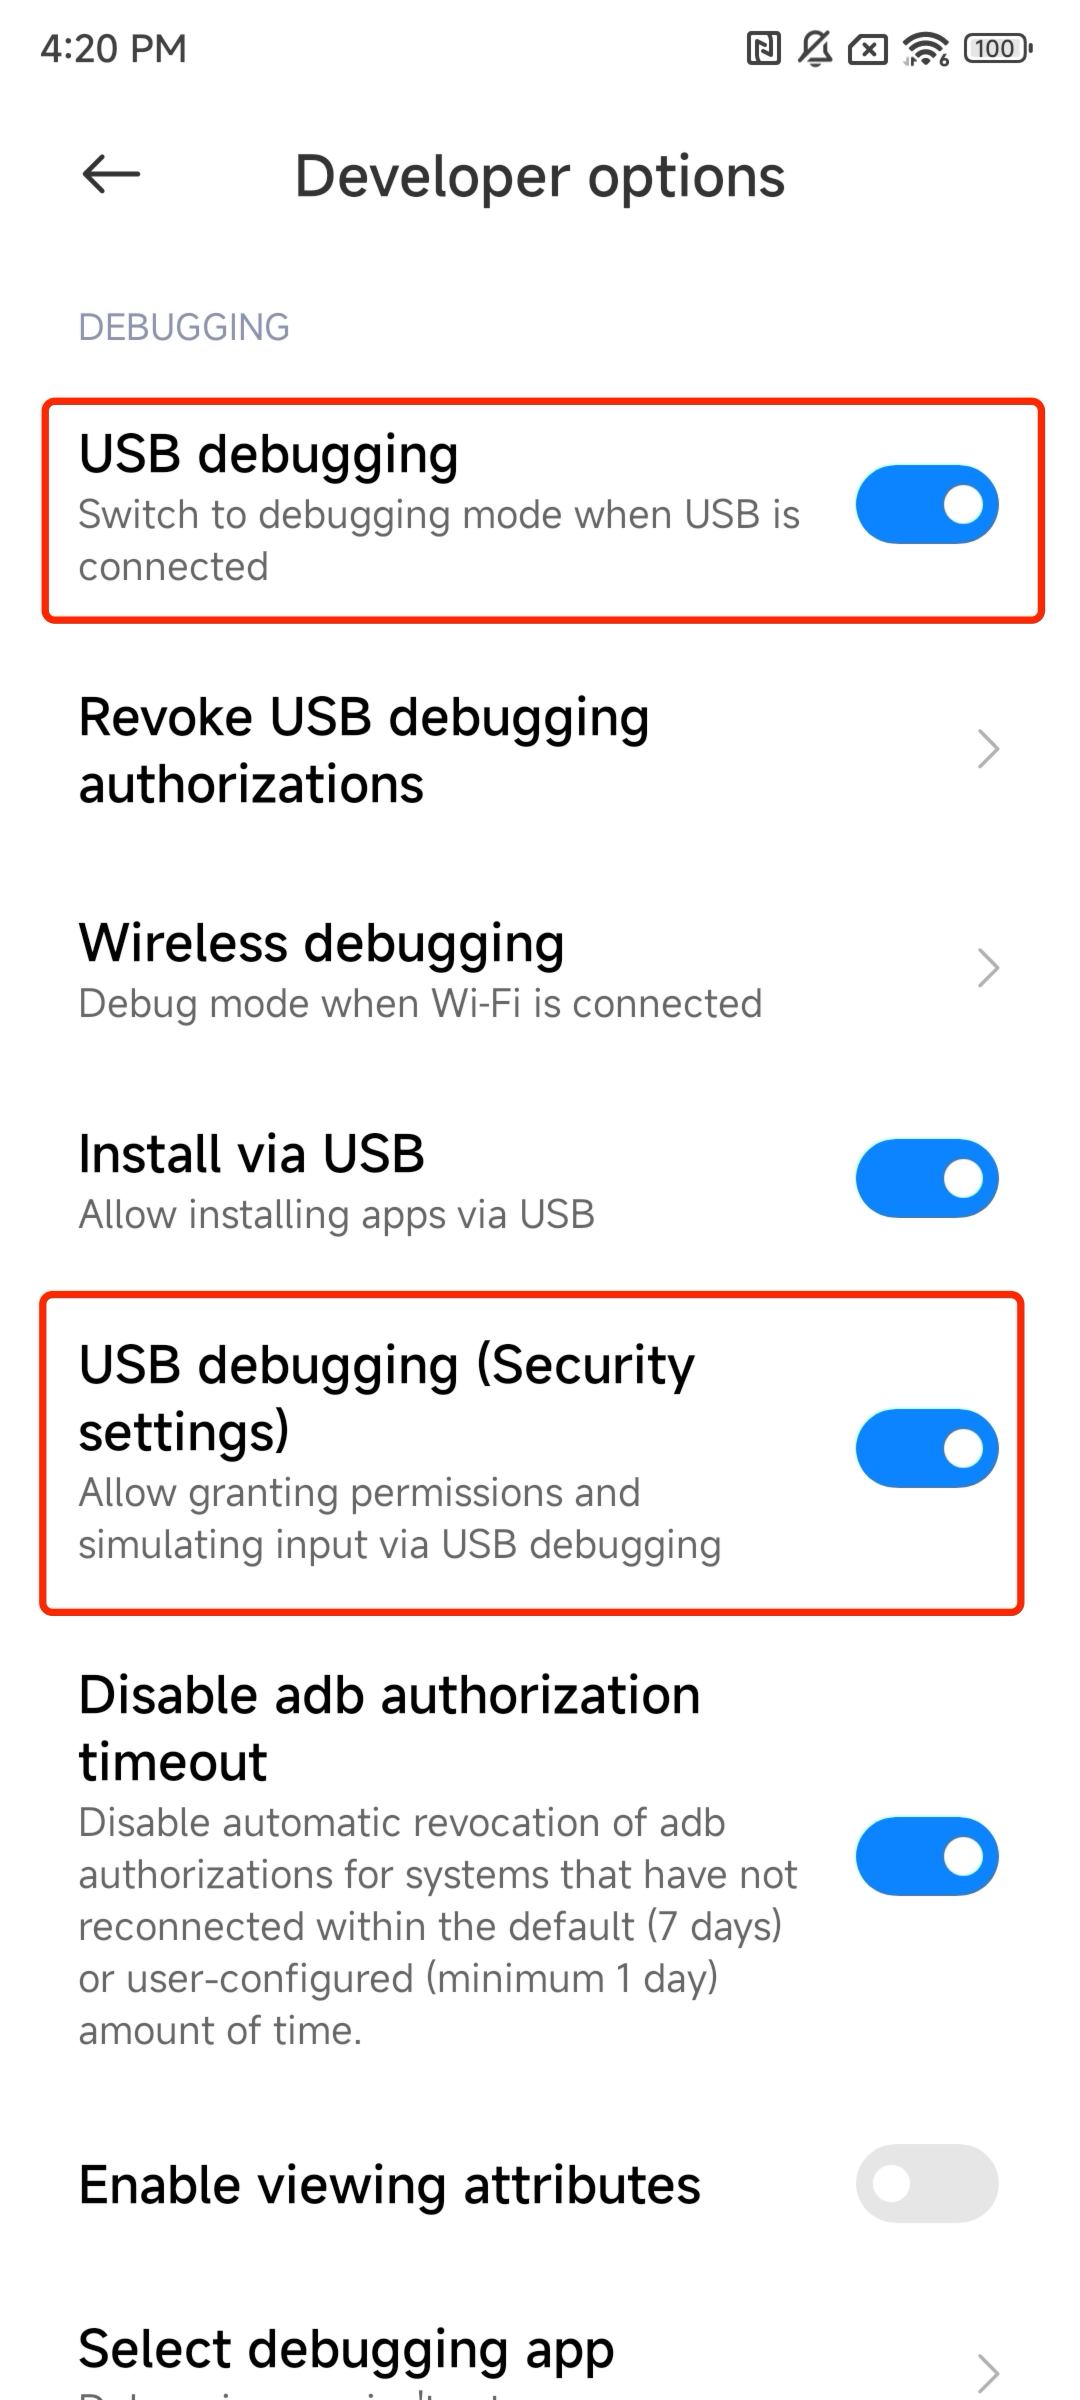
In the developer options of your Android device, enable 'USB debugging'. If 'USB debugging (Security settings)' exists, enable it as well. Then connect your Android device using a USB cable.
Verify the connection:
When you see the following output, it means the connection is successful:
Set up API keys for model
Set your model configs into the environment variables. You may refer to Model strategy for more details.
For more configuration details, please refer to Model strategy and Model configuration.
Integrate Midscene
Step 1: Install dependencies
Step 2: Write scripts
Let's take a simple example: search for headphones on eBay using the browser in the Android device. (Of course, you can also use any other apps on the Android device.)
Write the following code, and save it as ./demo.ts
Step 3: Run
Using tsx to run
After a while, you will see the following output:
Step 4: View the report
After the above command executes successfully, the console will output: Midscene - report file updated: /path/to/report/some_id.html. You can open this file in a browser to view the report.
Constructor and Interface
AndroidDevice Constructor
The AndroidDevice constructor supports the following parameters:
deviceId: string- The device idopts?: AndroidDeviceOpt- Optional, the options for the AndroidDeviceautoDismissKeyboard?: boolean- Optional, whether to dismiss the keyboard after inputting. (Default: true)keyboardDismissStrategy?: 'esc-first' | 'back-first'- Optional, the strategy to dismiss the keyboard. 'esc-first' tries ESC key first, then back key if needed. 'back-first' tries back key first, then ESC key if needed. (Default: 'esc-first')androidAdbPath?: string- Optional, the path to the adb executable.remoteAdbHost?: string- Optional, the remote adb host.remoteAdbPort?: number- Optional, the remote adb port.imeStrategy?: 'always-yadb' | 'yadb-for-non-ascii'- Optional, controls when Midscene invokes yadb for text input.'yadb-for-non-ascii'(default) automatically uses yadb for Unicode characters (including Latin Unicode like ö, é, ñ), Chinese, Japanese, and format specifiers (like %s, %d), while pure ASCII text uses the faster nativeadb input text.'always-yadb'forces yadb for all text input, providing maximum compatibility but slightly slower for pure ASCII. (Default: 'yadb-for-non-ascii')displayId?: number- Optional, the display id to use. (Default: undefined, means use the current display)screenshotResizeScale?: number- Deprecated. This option has been removed and no longer has any effect. UsescreenshotShrinkFactorinAgentOptinstead to control screenshot size sent to the AI model.minScreenshotBufferSize?: number- Optional, screenshot buffer size validation threshold in bytes. Buffers below this value are treated as failed or corrupted captures. Default is1024(1KB). Set to0to skip only this size check while still rejecting empty buffers and invalid image formats.alwaysRefreshScreenInfo?: boolean- Optional, whether to re-fetch screen size and orientation information every time. Default is false (uses cache for better performance). Set to true if the device may rotate or you need real-time screen information.
Additional Android Agent Interfaces
Except the common agent interfaces in API Reference, AndroidAgent also provides some other interfaces:
agent.launch()
Launch a webpage or native page.
- Type
-
Parameters:
uri: string- The uri to open, can be a webpage url or a native app's package name or activity name, if the activity name exists, it should be separated by / (e.g. com.android.settings/.Settings).
-
Return Value:
- Returns a Promise that resolves to void when the page is opened.
-
Examples:
agent.runAdbShell()
Execute a command through adb shell on the connected device.
Note: This method wraps
adb shelland forwards the command directly to the device.
- Type
-
Parameters:
command: string- The adb shell command to execute.
-
Return Value:
Promise<string>- Returns a Promise that resolves to the command output.
-
Examples:
agentFromAdbDevice()
Create a AndroidAgent from a connected adb device.
- Type
-
Parameters:
deviceId?: string- Optional, the adb device id to connect. If not provided, the first connected device will be used.opts?: PageAgentOpt & AndroidDeviceOpt- Optional, the options for the AndroidAgent, PageAgentOpt refer to constructor, AndroidDeviceOpt refer to AndroidDevice constructor.
-
Return Value:
Promise<AndroidAgent>Returns a Promise that resolves to an AndroidAgent.
-
Examples:
getConnectedDevices()
Get all connected Android devices.
- Type
-
Return Value:
Promise<Device[]>Returns a Promise that resolves to an array of Device.
-
Examples:
Extending Custom Interaction Actions
Use the customActions option to extend the agent's action space with your own actions defined via defineAction. When provided, these actions will be appended to the built-in ones so the agent can call them during planning.
Check Integrate with any interface for more details about defining custom actions.
More
- For all the APIs on the Agent, please refer to API Reference.
FAQ
Why can't I control the device even though I've connected it?
A typical error message is:
Please check if the device is unlocked in the developer options of the system settings.
Text input fails in WebView / Mobile web pages (input field appears empty after typing)
This is typically caused by the keyboard dismiss strategy. After Midscene inputs text via the virtual keyboard, it automatically dismisses the keyboard. The default strategy (esc-first) sends an ESCAPE key event first, which may be captured by WebView JavaScript and cause side effects such as:
- Closing the popup/modal that contains the input field
- Clearing the text just entered
- Navigating away from the current view
Solution: Set keyboardDismissStrategy to 'back-first' when creating the AndroidDevice, which uses the Android BACK key instead of ESCAPE to dismiss the keyboard:
If the input still fails, you can also try disabling auto keyboard dismiss entirely and let the AI agent handle keyboard state:
With auto dismiss disabled, the keyboard will remain visible and may cover a large portion of the screen. You can work around this by:
- Using
aiActto manually dismiss the keyboard, e.g.await agent.aiAct('dismiss the keyboard') - Installing and switching to ADBKeyBoard — a minimal virtual keyboard that takes up very little screen space, so it barely affects screen interactions even when visible
How to use a custom adb path, remote adb host and port?
You can use the MIDSCENE_ADB_PATH environment variable to specify the path to the adb executable, MIDSCENE_ADB_REMOTE_HOST environment variable to specify the remote adb host, MIDSCENE_ADB_REMOTE_PORT environment variable to specify the remote adb port.
Additionally, you can also specify the adb path, remote adb host and port through the AndroidDevice constructor.